
The key to learning to throw is to practice making pots -lots of pots. In addition to our 2-hour class meetings, it's a good idea to spend another two hours each week practicing on your own. During this practice session, I recommend that you throw
at least 8 pieces of clay and keep 2. If you practice this way for two hours each week (in addition to class time), you'll be making pots better, faster, more accurately, and you'll find the whole process much more fun.
Here's how practice looks:
First, decide what shape you're going to make. Commit to this shape; if you decide to make a mug and it ends up looking more like a bowl, don't settle for what you get. You can do better!
Next, take about 15 minutes to set up your wheel & tools, & to wedge, weigh, & knead your clay.
You'll need 4 1-lb. balls of clay, wedged & kneaded. Tools should include the following:
- bucket 1/2-full of water
- 4 bats
- towel
- sponge
- throwing stick
- wire
- needle
Then, throw each ball of clay.
Spend no more than 10 minutes per piece of clay. This is very important, for 2 reasons: #1, the top layer of the clay will get too wet and sticky to work with after about 10 minutes, and #2, the more time you take, the less you make.
When a piece collapses while you're working on it, don't try to rework the same piece of clay; You'll have better results if you cut it off with your wire and start over with a fresh ball of clay. Also, instead of smooshing up the collapsed piece of clay right away, set it aside as-is, and let the surface water dry off a bit first.
When you're done with all 4 balls of clay, WALK AWAY. Take a 5-minute break; don't touch anything. Seriously, don't touch it! Get a cup of coffee, make a phone call, do some yoga, etc. This is so you can look at the pieces you've made with a fresh eye, and to give yourself some psychological distance from your pots.
Here's the hardest (and most important) part:
After a 5 minute break, come back and take a look at the 4 pots you've made. Set the best one aside to keep- and
smoosh up the other 3. I know; at this point, a finished pot can seem like a miracle and smooshing it up is probably the last thing you want to do. It's easy to become so attached to all of the effort and struggle that you've put into the surviving pieces that it almost seems like murder, but you gotta rip that Band-Aid
off. Besides, if you know at the outset there's 75% chance you'll end up smooshing up the piece anyway, maybe you can worry a little less about wrecking the piece that you're throwing. This is supposed to be fun & relaxing, right?
Incidentally, before smooshing, it can be helpful to cut each piece in half from top to bottom. This will reveal the cross section, and you'll be able to easily spot unevenness, thick/thin bottoms, and other trouble areas.
So, your 2 hours is about half over at this point. The second half of practice is to throw 4 more balls of clay, then clean up.
Next, wedge the smooshed pieces back up with the rest of your clay. It'll look like the clay's way too wet, but trust me, it's not; that's mostly surface water. After a couple of minutes of wedging, the clay won't seem so sticky anymore.
Weigh out & knead 4 lbs of wedged clay, then cut it into 4 1-lb. pieces.
Then, throw each ball of clay same as before:
Spend no more than 10 minutes per piece of clay; cut off collapsed pieces right away; walk away for 5 minutes when you're done with all 4 pieces; keep the best one & smoosh up the other 3.
Finally, take about 10 minutes to finish up: wrap up the pieces you've kept and put them on the class shelf; bag up your clay, clean off tools & wheel &c.
So, to recap, your 2-hour practice time should look something like this:
Set-up & clay prep: about 15 minutes
throw 4 balls of clay: 20-40 minutes
take a break & wedge clay: about 10 minutes
throw 4 balls of clay: 20-40 minutes
take a break & clean-up: about 15 minutes
Any remaining time you can use to glaze, soften or reclaim clay, pull handles, finish leatherhard pots, clean up greenware, etc.
At the end of your 80-120 minutes, you should have 2 pieces to keep and a bag of nice soft clay.
One last thing: it's not going to be frustrating forever; if you don't give up, at some point it really is fun! My take on it is that if it was easy, it wouldn't be worth doing.
Keep practicing!
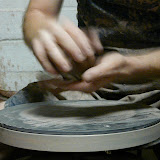
 http://www.flickr.com/photos/divemasterking2000/ / CC BY 2.0

